- OS setup
# cd ~/
# sudo apt -y install wget https://www.rconfig.com/downloads/rconfig7_ubuntu.sh -O install.sh
# chmod +x install.sh
# sudo ./install.sh
- Database setup
- Login to your database server as root
- Create a new database
# mysql -u root -p
# CREATE DATABASE rconfig;
- Create a new user if required (do not use the credentials below in production). This is likely required for Ubutnu 20.04+. If you are using a different OS, you may not need to create a new user, and you can use the root account, though this is not recommended.
# CREATE USER ‘user1’@’localhost’ IDENTIFIED BY ‘password1’;
# GRANT ALL PRIVILEGES ON rconfig.* TO ‘user1’@’localhost’;
# FLUSH PRIVILEGES;
- Exit the database
# exit
- Rconfig Setup Steps
- Login as root
- Clone the repo
# cd /var/www/html
# git clone https://github.com/rconfig/rconfig.git
- Change directory to the repo
# cd rconfig
- Create the .env file
#cp example .env
- Edit the .env file and update the following variables:
APP_URL=”https://SERVER.DOMAIN.LOCAL”
APP_DIR_PATH=/var/www/html/rconfig
DB_HOST=DBHOST
DB_PORT=3306
DB_DATABASE=DBNAME
DB_USERNAME=DBUSER
DB_PASSWORD=DBPASS
- Update apache config file for correct server name.
# sudo vi /etc/apache2/sites-enabled/rconfig-vhost.conf
Update the Server-name to match your server’s domain name
ServerName YourServerName.domain.local
ServerAlias YourServerName.domain.local
- Restart apache
# systemctl restart apache2
- Open the browser and navigate to your server’s domain name. You should see the rConfig login page. The default system credentials are below. Please change or remove these as soon as a new admin user is created.
Username: admin@domain.com
Password: admin
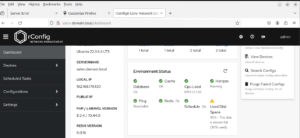
Dashboard of Rconfig
Leave A Comment?