Base OS – Linux (ubuntu 20.04)
root@tacasgui:~/tgui_install# sudo apt update
root@tacasgui:~/tgui_install# sudo apt install mysql-server
root@tacgui:/home/tacgui# sudo systemctl start mysql.service
root@tacgui:/home/tacgui# sudo mysql_secure_installation
Securing the MySQL server deployment.
Connecting to MySQL using a blank password.
VALIDATE PASSWORD COMPONENT can be used to test passwords
and improve security. It checks the strength of password
and allows the users to set only those passwords which are
secure enough. Would you like to setup VALIDATE PASSWORD component?
Press y|Y for Yes, any other key for No: yes
There are three levels of password validation policy:
LOW Length >= 8
MEDIUM Length >= 8, numeric, mixed case, and special characters
STRONG Length >= 8, numeric, mixed case, special characters and dictionary file
Please enter 0 = LOW, 1 = MEDIUM and 2 = STRONG: 0
Skipping password set for root as authentication with auth_socket is used by def ault.
If you would like to use password authentication instead, this can be done with the “ALTER_USER” command.
See https://dev.mysql.com/doc/refman/8.0/en/alter-user.html#alter-user-password- management for more information.
By default, a MySQL installation has an anonymous user,
allowing anyone to log into MySQL without having to have
a user account created for them. This is intended only for
testing, and to make the installation go a bit smoother.
You should remove them before moving into a production
environment.
Remove anonymous users? (Press y|Y for Yes, any other key for No) : no
… skipping.
Normally, root should only be allowed to connect from
‘localhost’. This ensures that someone cannot guess at
the root password from the network.
Disallow root login remotely? (Press y|Y for Yes, any other key for No) : no
… skipping.
By default, MySQL comes with a database named ‘test’ that
anyone can access. This is also intended only for testing,
and should be removed before moving into a production
environment.
Remove test database and access to it? (Press y|Y for Yes, any other key for No) : no
… skipping.
Reloading the privilege tables will ensure that all changes
made so far will take effect immediately.
Reload privilege tables now? (Press y|Y for Yes, any other key for No) : no
… skipping.
All done!
root@tacgui:/home/tacgui# sudo mysql
Welcome to the MySQL monitor. Commands end with ; or \g.
Your MySQL connection id is 10
Server version: 8.0.37-0ubuntu0.20.04.3 (Ubuntu)
Copyright (c) 2000, 2024, Oracle and/or its affiliates.
Oracle is a registered trademark of Oracle Corporation and/or its
affiliates. Other names may be trademarks of their respective
owners.
Type ‘help;’ or ‘\h’ for help. Type ‘\c’ to clear the current input statement.
mysql> ALTER USER ‘root’@’localhost’ IDENTIFIED WITH mysql_native_password BY ‘password’;
Query OK, 0 rows affected (0.01 sec)
mysql> FLUSH PRIVILEGES;
Query OK, 0 rows affected (0.01 sec)
mysql> CREATE USER ‘tgui_user’@’localhost’ IDENTIFIED WITH mysql_native_password BY ‘[use DB_PASSWORD from config.php]’;
Query OK, 0 rows affected (0.02 sec)
mysql> GRANT ALL PRIVILEGES ON *.* TO ‘tgui_user’@’localhost’ WITH GRANT OPTION;
Query OK, 0 rows affected (0.02 sec)
mysql> flush privileges;
Query OK, 0 rows affected (0.00 sec)
mysql> ALTER USER ‘tgui_user’@’localhost’ IDENTIFIED WITH mysql_native_password BY ‘password’;
Query OK, 0 rows affected (0.02 sec)
mysql> GRANT ALL PRIVILEGES ON *.* TO ‘tgui_user’@’localhost’ WITH GRANT OPTION;
Query OK, 0 rows affected (0.01 sec)
mysql> FLUSH PRIVILEGES;
Query OK, 0 rows affected (0.00 sec)
Prepare and run your script
- Move to home, delete old data (if it is) and download latest release (or just copy/past):
cd ~; sudo rm -r tgui_install*; wget https://github.com/tacacsgui/tgui_install/releases/download/2.0.2/tgui_install.tar.gz
- Unpack and move to unpacked files:
mkdir tgui_install; tar -xvf tgui_install.tar.gz -C ~/tgui_install/ --strip-components 1; cd ./tgui_install
- Make it executable and run:
sudo chmod 755 ./tacacsgui.sh ; sudo ./tacacsgui.sh
###############################################################
############## TACACSGUI Installation Script ##############
###############################################################
ver. 2.0.0
############## List of available options ##############
1) Install TacacsGUI 3) Network Settings 5) Clear and Refresh Menu 7) Quit
2) Re-install TacacsGUI 4) Test the System 6) Write to Log file
Please enter your choice (5 to clear output): 1
root@tacgui:~/tgui_install# nano /opt/tacacsgui/web/api/config.php
Change the password as kept.
/** The name of the database */
define(‘DB_NAME’, ‘tgui’);
define(‘DB_NAME_LOG’, ‘tgui_log’);
/** MySQL database username */
define(‘DB_USER’, ‘tgui_user’);
/** MySQL database password */
define(‘DB_PASSWORD’, ‘password’);
/** MySQL hostname */
define(‘DB_HOST’, ‘localhost’);
/** Database Charset to use in creating database tables. */
define(‘DB_CHARSET’, ‘utf8’);
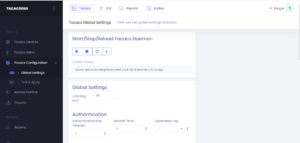
Now, the status of tacasgui would be inactive. So to make it active. Click on the inactive button.

Press the inactive button and press play button.


Leave A Comment?